Zebra Printer
The Zebra Printer prints custom RFID Labels that are customized for Optometry and the Zebra Printer. This setup is a critical part of Eyesoft so don’t rush this. Take your time!
Step 1: Power On Your Zebra RFID Printer
- Unbox your Zebra printer and ensure all components are included.
- Plug the printer into a power source and connect it to the internet via an Ethernet cable
- Press the power button located on the top of the printer to boot it up.
Note:
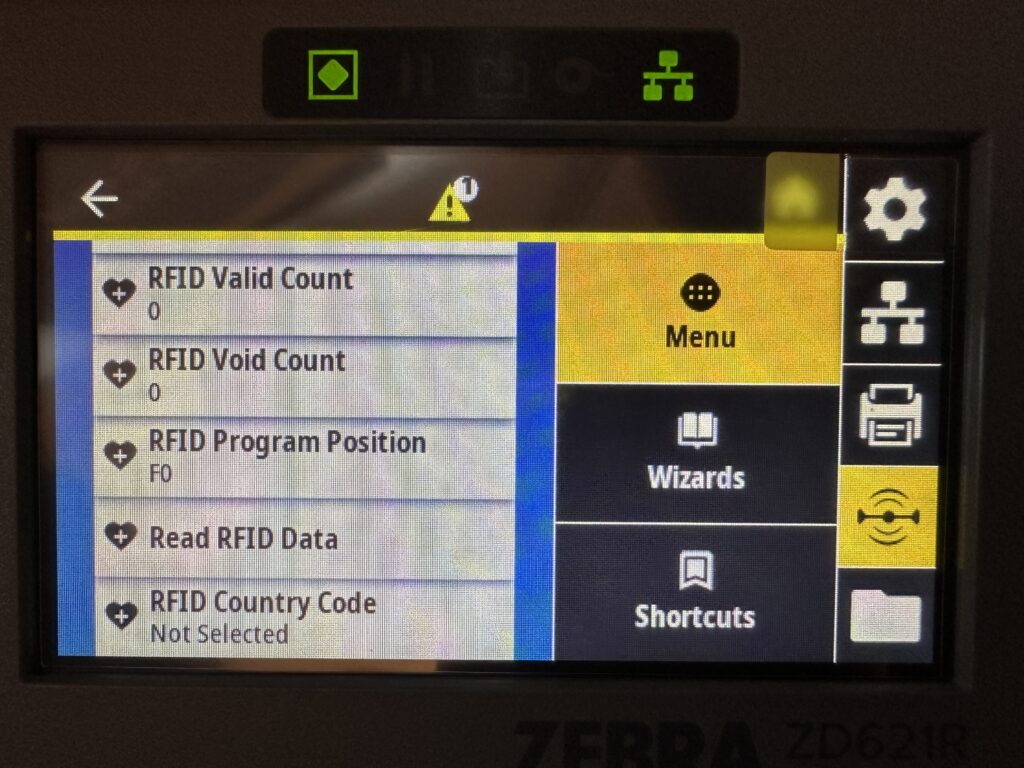
If you see a warning saying “RFID country code not selected,” tap the X to dismiss the message. This setting will be configured later during the setup process.
Then click Printer Info, click the RFID Icon (looks like a line with curves coming out of it). Then scroll down to RFID Country Code. From here Select Australia / New Zealand.
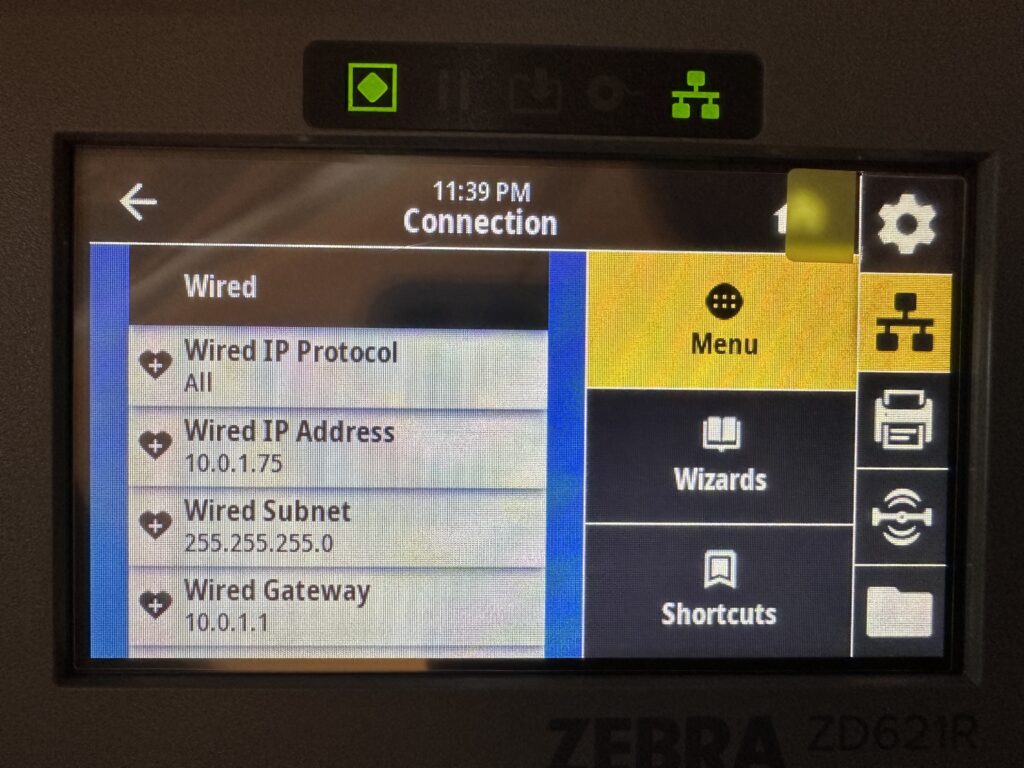
Step 2: Find Your Printer’s IP Address
To connect your Zebra printer to the EyeSoft web interface, you’ll need its IP address. Follow these steps to locate it:
- On the printer’s screen, tap the Network Icon.
- Select Wired from the options.
- The Wired IP Address will be displayed on the screen.
Important:
Write down the IP address, as you’ll need it for configuration in a later step. See the example below for reference.
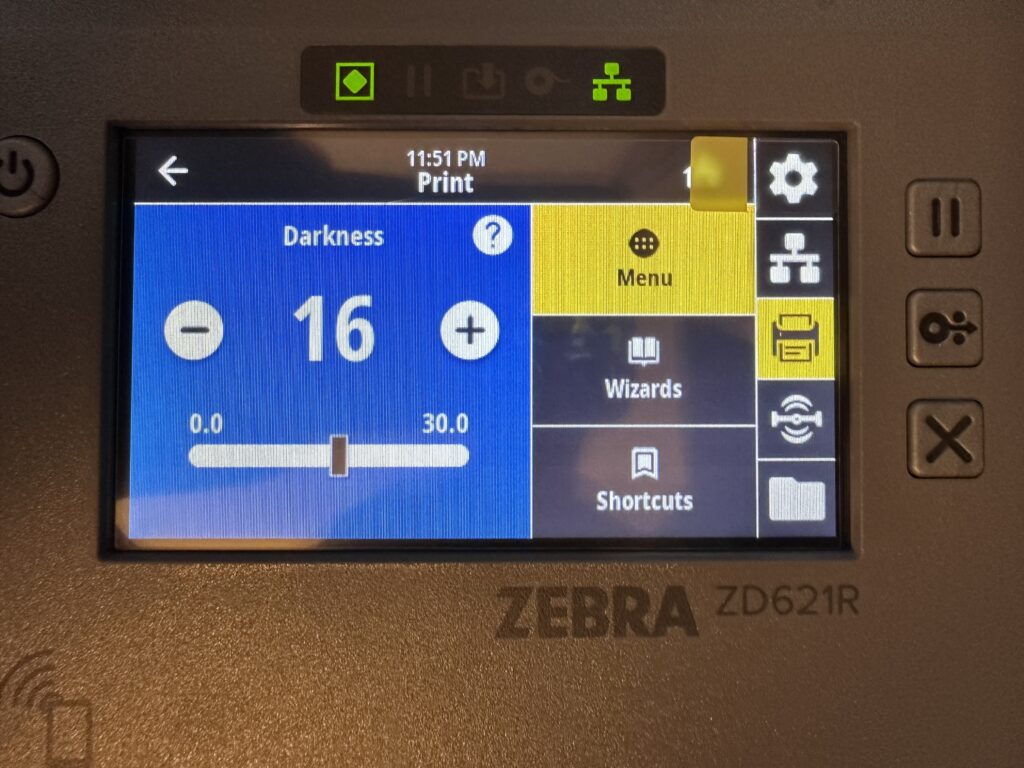
Step 3: Adjust Print Quality Settings
To ensure detailed and high-quality prints, follow these steps to adjust your printer’s settings:
- Tap the Printer Icon on the printer’s screen.
- Select Print Quality from the menu.
- Set the Print Quality value to 16 for optimal results.
Note:
Avoid setting the quality too high, as this may reduce the overall lifespan of the printer’s laser.
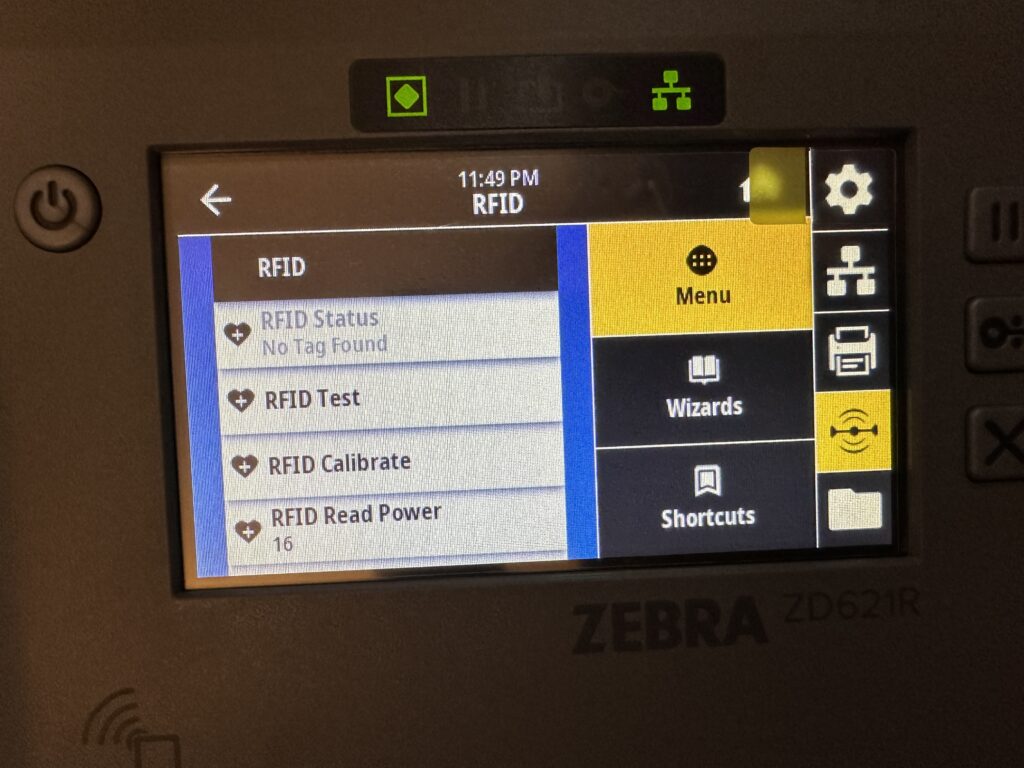
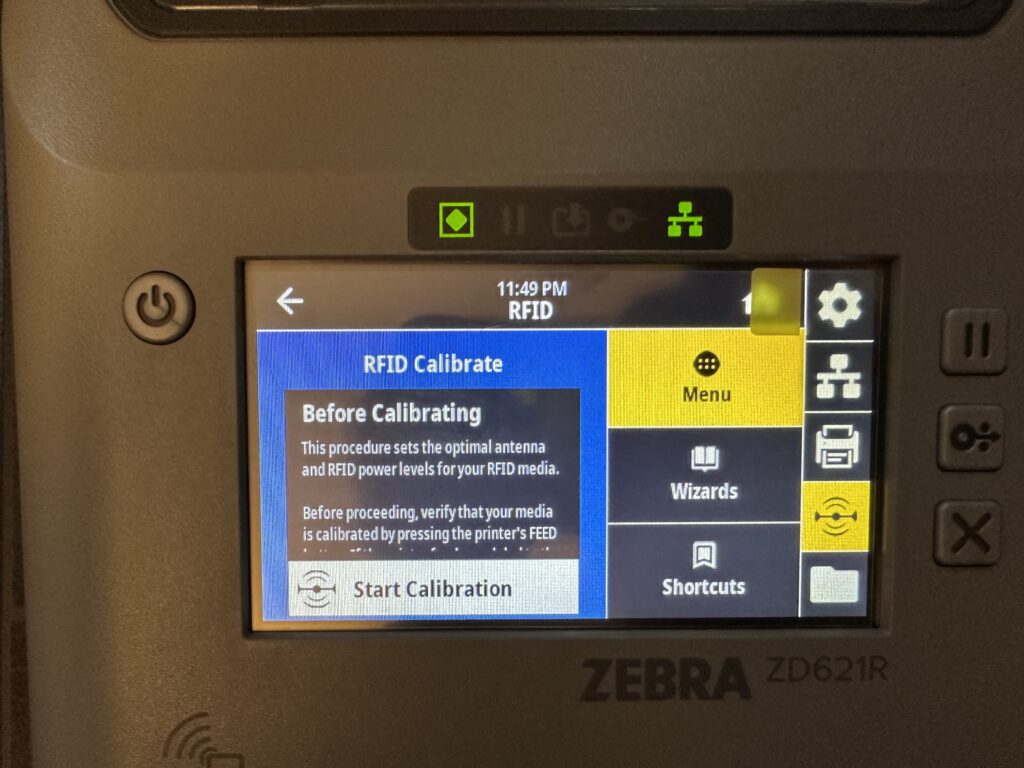
Step 4: Calibrate Print Media for RFID
To ensure your printer correctly encodes RFID labels, you’ll need to calibrate the print media. Follow these steps:
- Tap the RFID menu on the printer’s screen.
- Select RFID Calibrate from the options.
- Allow the printer to perform the calibration process.
Why Calibration Matters:
Proper calibration ensures the RFID tags are encoded accurately and that the printer operates efficiently with your label media.
Then click Start Calibration and follow the on screen steps
This will involve removing labels from the backing paper so the sensor can read the thickness of the backing paper like this
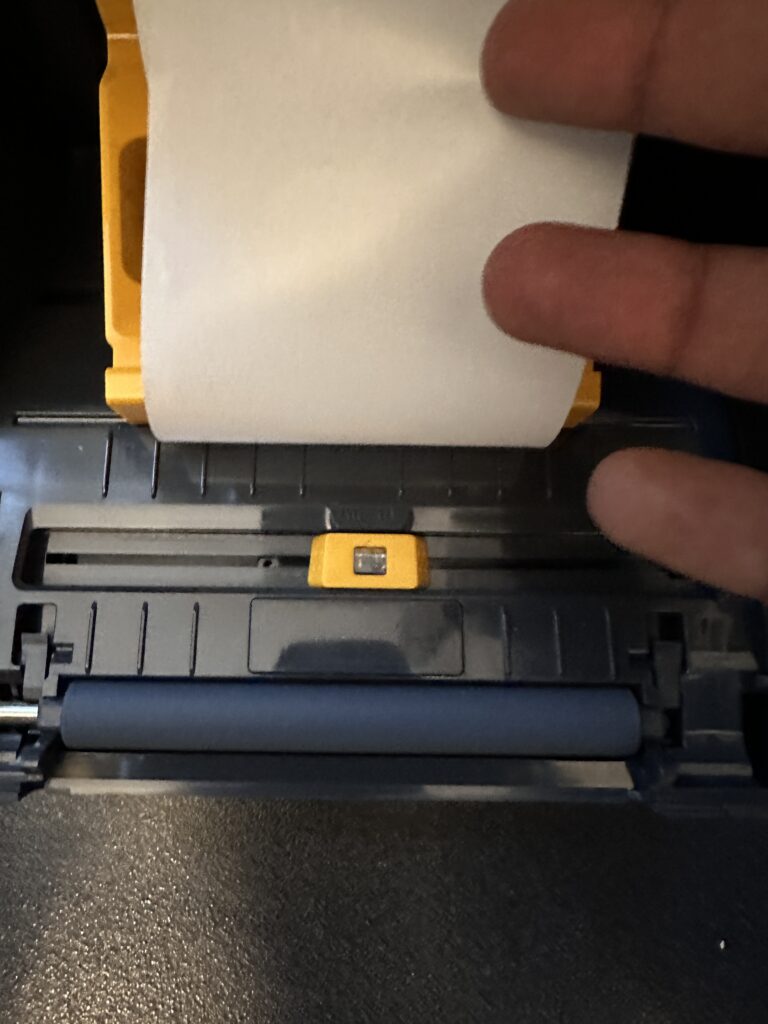
Step 5: Perform Calibration
During the calibration process, the printer will measure the thickness of the label backing and the label itself to ensure accurate printing and RFID encoding. Follow these steps carefully:
Steps to Follow:
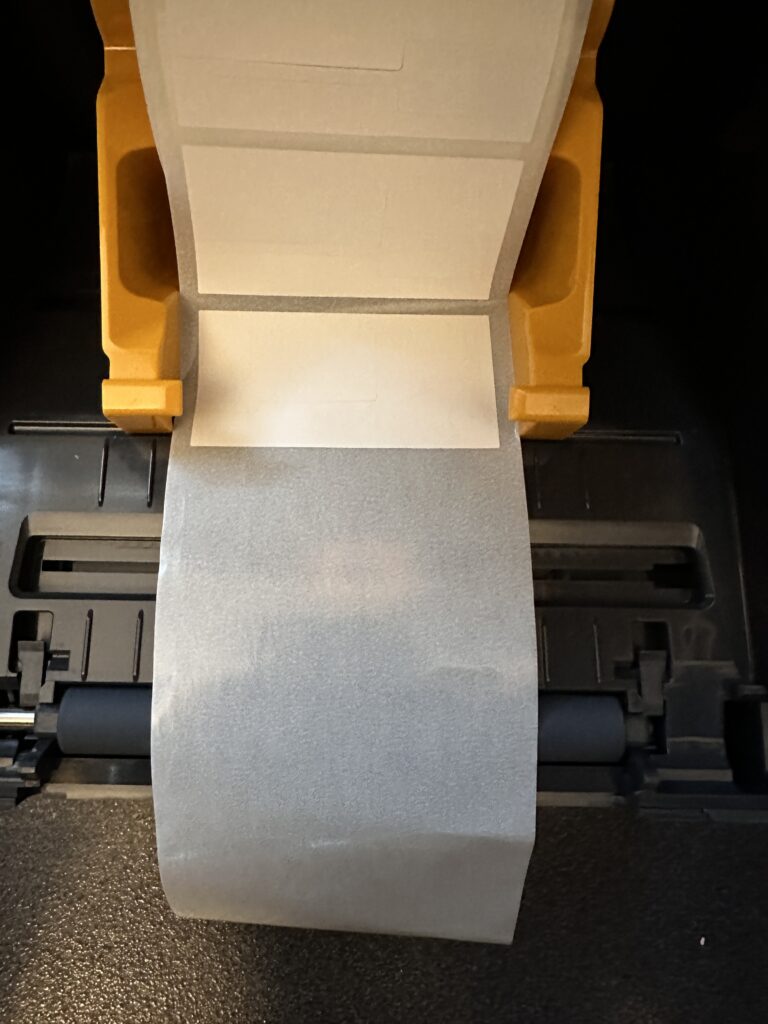
- Peel off several labels from the backing paper, as shown in the example image.
- Load the backing paper (without the labels) into the printer so the sensor can measure its thickness.
- Close the printer lid and allow the sensor to read the backing paper.
- Move the roll slightly to position a label over the sensor, allowing it to measure the thickness of the label itself.
What to Expect:
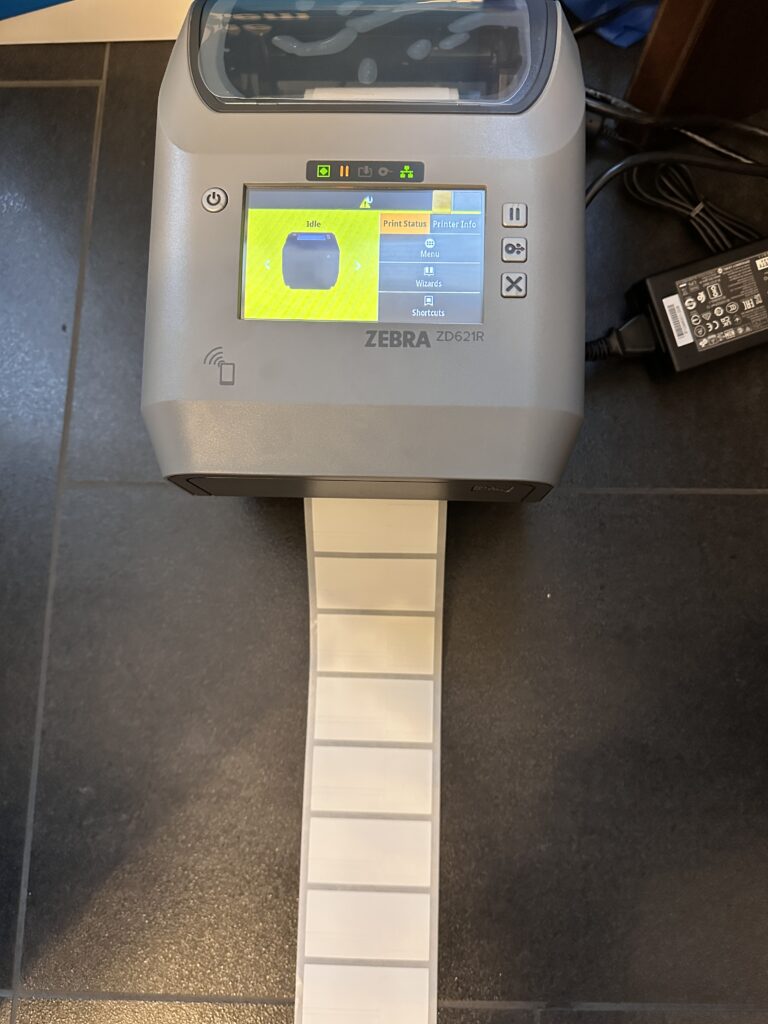
The printer will automatically calibrate and may eject a few labels as part of its self-test process. This is normal and ensures the printer is correctly calibrated for your labels.
Lastly we will go to app.eyesoft.ca sign in and go to Quick Labels from here click the Gear icon next to your main device.

And enter the Wired IP Address from the printer into the Printer IP Address field, also adjust the Label Orientation field so it matches the physical labels, then click Update Settings

Congratulations you are ready to print RFID labels!