To setup your new zebra device first plug it into power and the network.
Then open the web browser and go to https://fx7500xxxxxx (where the xxxxxx is the last 6 digits of the Mac address written on the device) if that doesn’t load then try http://fx7500xxxxxx.local
Worst case if neither works use cmd prompt and ping fx7500xxxxxx.local to get the device IP
The default login is:
Username: Admin
Password: change
This will prompt you to set a new password. set the password to the last 6 digits of the Mac + “A1!”
eg. 84f74cA1!

If it asks for you to set the region choose country Canada from the dropdown and click “I Accept“

Next once you login go to Communication > Services > and change Webserver from HTTPS to HTTP
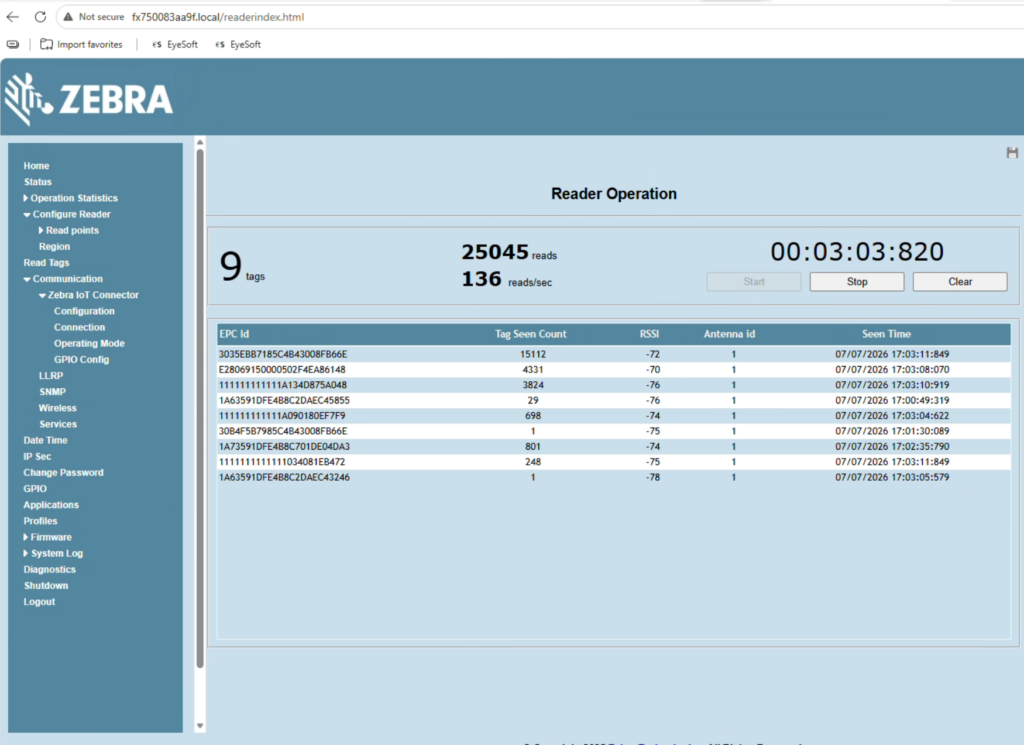
You can use the “READ TAGS” field to monitor its current readings and grade how large the ‘bubble’ is for the antenna where it is picking up new items
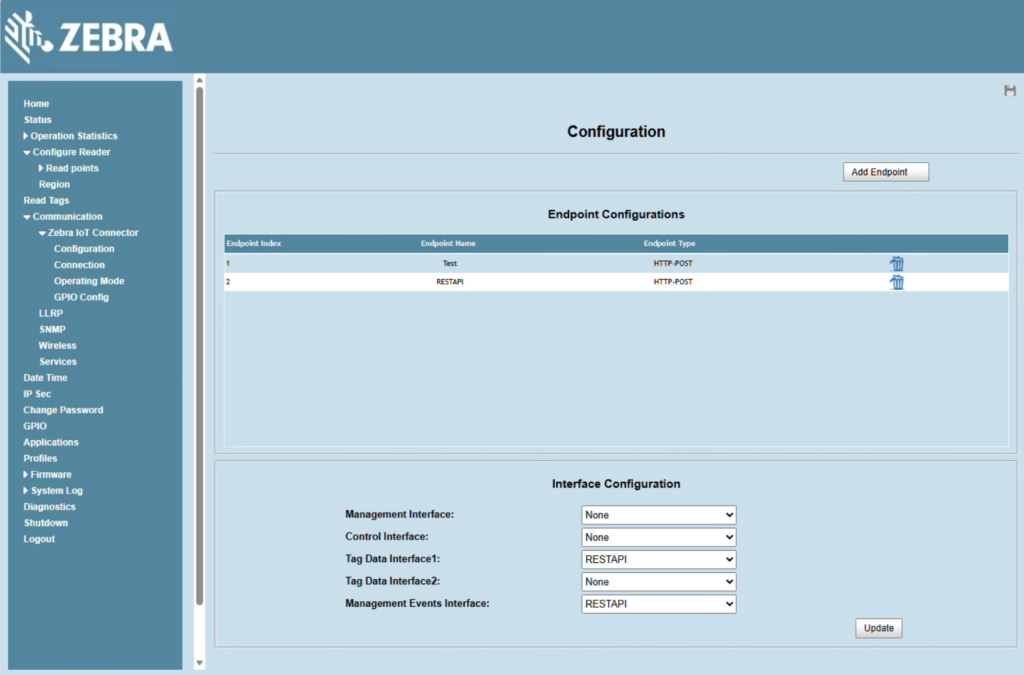
Configuration should look like this under Communication > Zebra IOT connector > configuration:
where the RESTAPI is the real endpoint and used for data interface and management events.
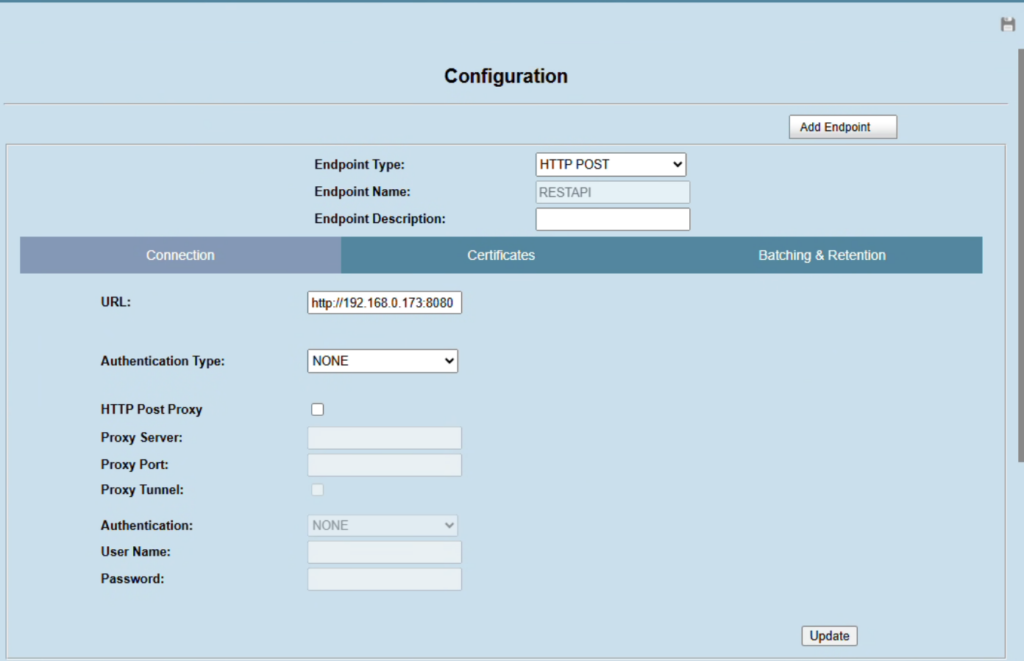
The REST API should be pointed to the EyeSoft HUB’s static IP Address and needs the hub app running. its port 8080 and no auth is needed.
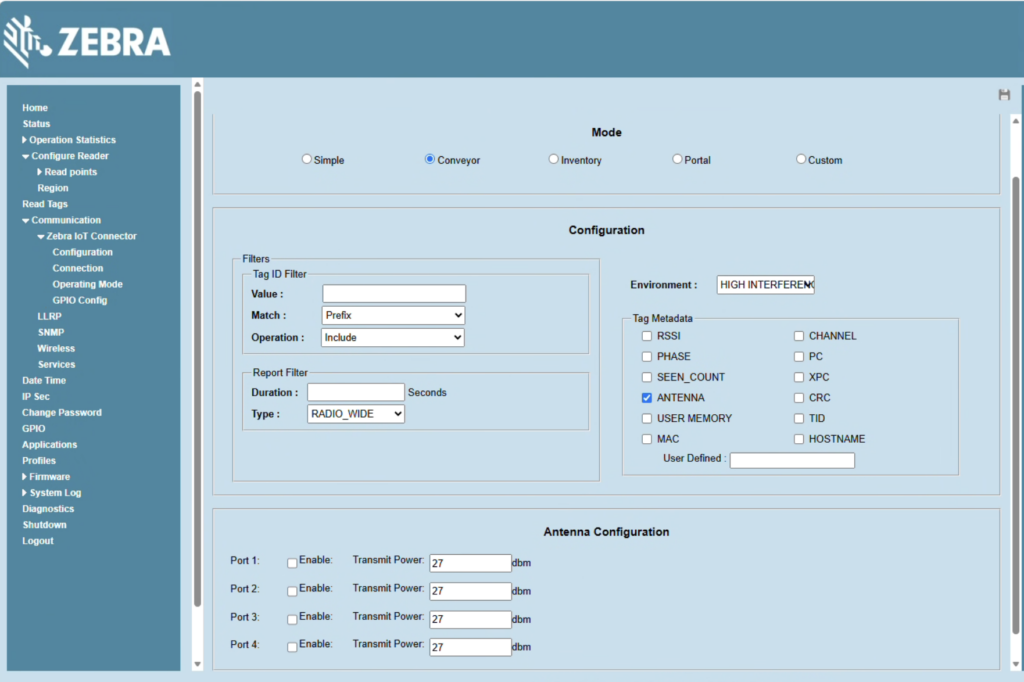
operation mode under the IOT connector should look like this with Conveyor selected
Now to get the API access you need to use postman
GET URL: https://192.168.1.107/cloud/localRestLogin
Basic Auth: User: admin, Pass: same as admin password
this will give you a token you can use for calls
{
“code”: 0,
“message”: “eyJ0eXAiOiJKV1QiLCJhbGciOiJIUzI1NiJ9.eyJpc3MiOiJaRUJSQSIsImV4cCI6MTc3MDA2NzMxN30.4TnbrP8GJbHjefO8GDinUvgQZsX1W3EhsVrgDesmCmZUT97IBYaAtha-124cDkAaCKk0oYDgEmeM0Xenq3rulg”
}